Living with the UniFi G4 Doorbell Pro After a Year and a Half
After 18 months of North Dakota winters, the UniFi G4 Doorbell Pro proves its reliability. Learn how it integrates with Home Assistant, displays LCD messages, and powers smart automations..
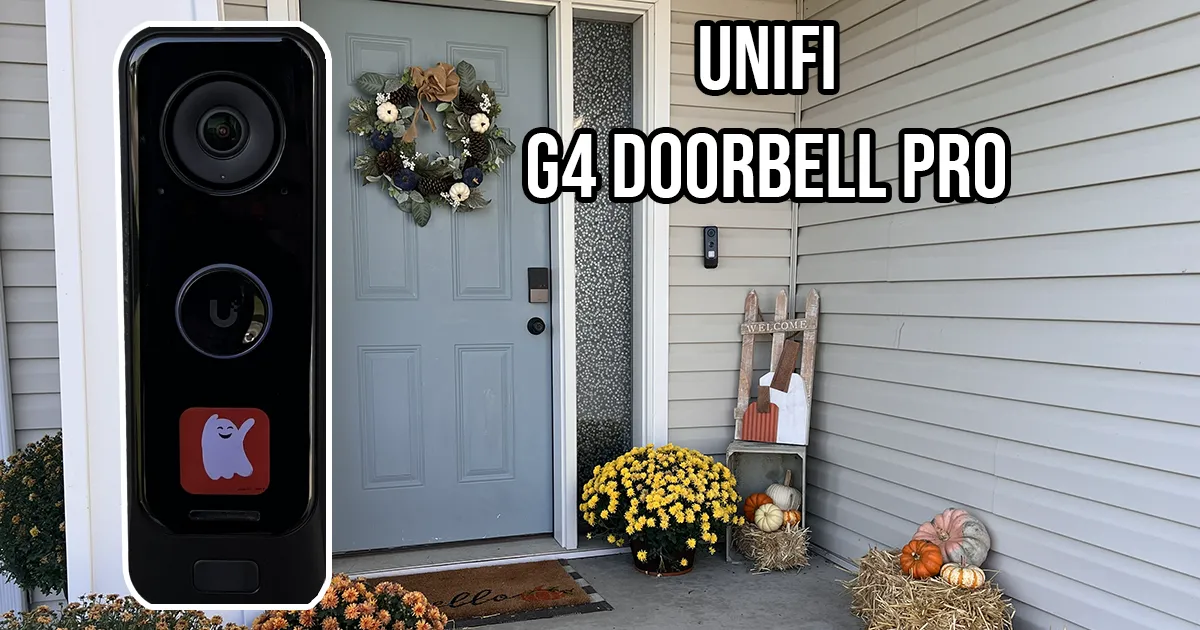
Living with the UniFi G4 Doorbell Pro After a Year and a Half
I installed the UniFi G4 Doorbell Pro in February 2024, replacing a Ring doorbell that had worn out its welcome. Between the rising subscription fees and motion events that captured nothing but my empty porch because Ring started recording too late, I was ready for something better.
I went with the PoE version because it’s rated for -30 to 40º C (-22 to 104º F), which matters when you live in North Dakota. After several winters of swapping out Ring batteries and watching the doorbell turn into a frozen brick by February, I wanted something that just worked year-round.
This post kicks off a short series on the UniFi G4 Doorbell Pro and Home Assistant. Over the next few weeks, I’ll be sharing follow-ups that cover UniFi Protect alarms and webhooks, NFC and fingerprint access, and custom animations and sounds — each building on what this doorbell can do inside a smart home setup.
The G4 has easily handled everything thrown at it — subzero mornings, sideways rain, clouds of dust from windy North Dakota days before the fields start to grow, and the occasional toddler finger jammed into the button. The lens coating still looks clear, the button hasn’t yellowed, and UniFi has pushed several firmware updates that improved motion detection and responsiveness.
Because it’s PoE-powered, the camera wakes instantly and never slows down in the cold. With 24/7 recording to my UniFi Dream Machine SE, it’s impossible to miss an event, and the dedicated package camera is surprisingly useful for getting notifications when deliveries arrive. The infrared LEDs handle snow-covered nights better than expected, and even on the windiest days it keeps a steady stream without dropping connection.
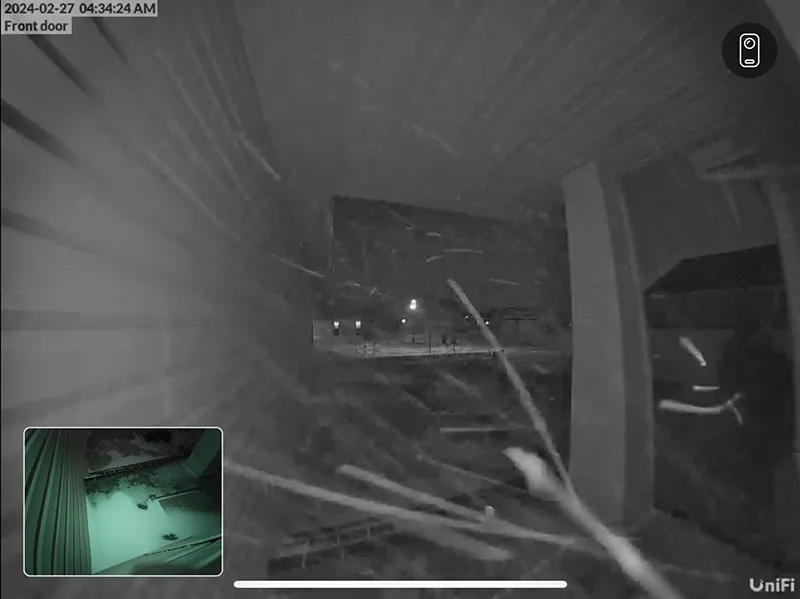 Unifi G4 Doorbell Pro Winter Storm Recording
Resources in This Post
ChrisHansenTech is a participant in the Amazon Services LLC Associates Program, an affiliate advertising program designed to provide a means for sites to earn advertising fees by advertising and linking to Amazon.com. As an Amazon Associate I earn from qualifying purchases.
- UniFi G4 Doorbell Pro PoE Kit
- UniFi Dream Machine Special Edition
- Doorbell Sprites - GitHub repo from Nicholas Saraniti (tracerrx)
Hardware Installation
I won’t go into a full step-by-step here, but for anyone curious about the general setup, the installation is straightforward. The hardest part for me was fishing CAT6 cable to where the doorbell is mounted. Luckily, my network rack is in the basement utility room — directly below the front door — and that space is unfinished. I was able to run the cable through the basement ceiling and only had to drill one hole between the studs under the doorbell location (with plenty of insulation in the way, of course).
After that, it was just a matter of attaching the mounting bracket to the wall, plugging in the CAT6 cable, snapping the doorbell into the bracket, and installing the security screw.
Once connected, UniFi Protect automatically detects the doorbell, so just adopt it in the app and you’re ready to go.
Connecting UniFi Protect to Home Assistant
This example uses a UniFi Dream Machine SE running UniFi OS 4.3.6 and UniFi Protect 6.1.78.
Depending on your hardware and software versions, steps may vary slightly.
If you have never set up UniFi with Home Assistant, you’ll first need to create a local admin user and API key in UniFi OS.
- Log into your UniFi OS device
- Click Admins & Users
- Click Create New
- Check Restrict to Local Access Only
- Enter a Username and Password
- Set the Role as admin
- Click Create
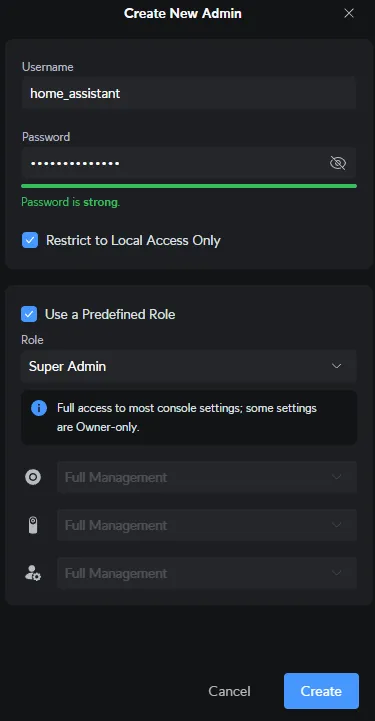 UniFi OS Create User
After creating the user, log in with it to generate an API key:
- Click Settings
- Click Control Plane
- Click Integrations
- Enter an API Key Name
- Select Never Expires
- Click Create API Key
- Click Copy Key
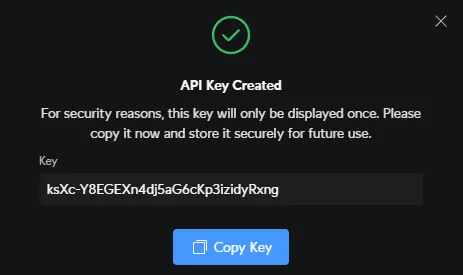 UniFi OS Copy API Key
That API key’s been sent up to the farm… the digital one.
Now you can add the UniFi Protect integration to Home Assistant:
- Open Home Assistant
- Go to Settings → Devices & services
- Click Add Integration
- Search for Ubiquiti → UniFi Protect
- Enter the IP, username, password, and API key
- Click Submit
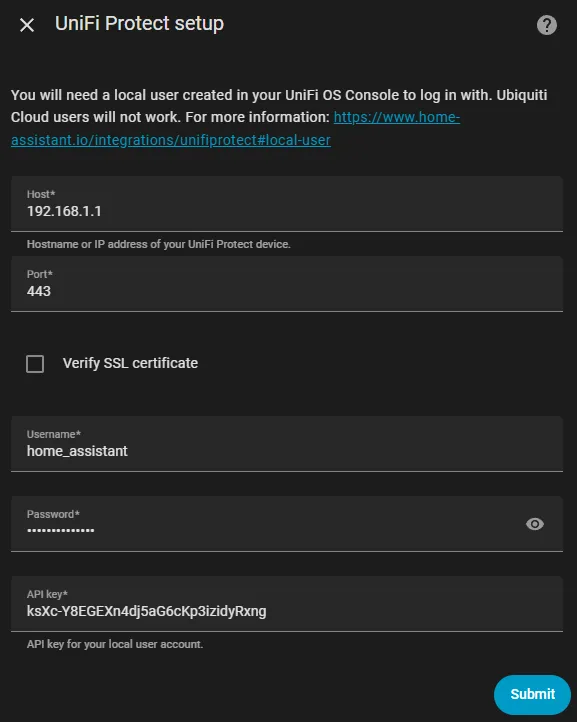 Home Assistant UniFi Protect Setup
Once set up, you’ll see entities like:
camera.front_door_high_resolution_channelcamera.front_door_package_camerabinary_sensor.front_door_person_detectedbinary_sensor.front_door_doorbell
These open up a lot of possibilities, such as sending a rich notification when the doorbell button is pressed:
1
2
3
4
5
6
7
8
9
10
11
12
alias: Doorbell
trigger:
  - platform: state
    entity_id: binary_sensor.[YOUR_DOORBELL_BUTTON_ENTITY]
    to: "on"
action:
  - service: notify.[YOUR_MOBILE_PHONE_ENTITY]
    data:
      message: Doorbell pressed at {{ now().strftime('%I:%M %p') }}
      title: Someone's at the door
      data:
        entity_id: camera.[YOUR_DOORBELL_CAMERA_ENTITY]
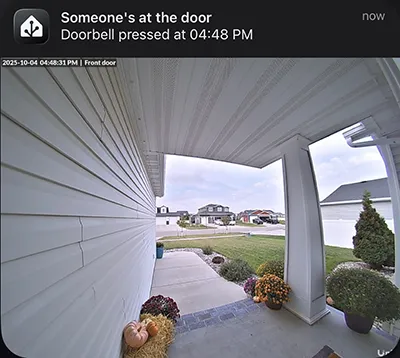 iPhone Companion App Notification
Setting Doorbell LCD Message in Home Assistant
You can manually set the LCD message on the doorbell or choose from a preset selection using the UniFi Protect integration.
To set a custom message:
1
2
3
4
5
action: text.set_value
target:
  entity_id: text.[YOUR_DOORBELL]
data:
  value: Hello, World!
Or use the select entity to switch messages:
1
2
3
4
5
action: select.select_option
target:
  entity_id: select.[YOUR_DOORBELL]
data:
  option: Default Message (WELCOME)
Selecting Default Message (WELCOME) restores the default ‘Hello’ message with the dog graphic.
Setting Animations and Sounds in UniFi Protect App
One unique feature of the UniFi G4 Doorbell Pro is its LCD screen, which can display messages or animations when someone approaches or presses the button.
The steps below are based on the iPhone version of the UniFi Protect app.
- Open the UniFi Protect app
- Tap the camera preview for your doorbell
- Tap the gear icon for settings
- Tap Camera Settings → Visitor Message
You can upload custom images or animated GIFs directly from your phone. Use Reset Duration to control how long the image remains displayed.
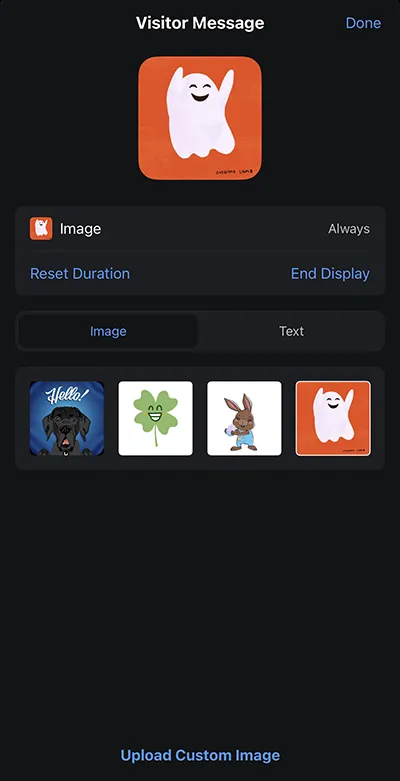 UniFi Protect App Visitor Message
To change the visitor tone:
- Open Camera Settings → Visitor Tone → Ringtone
- Choose a built-in tone or record a custom one.
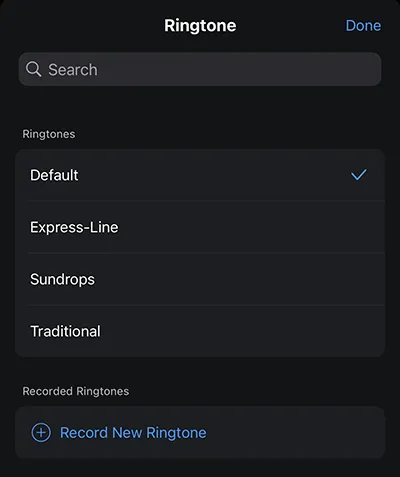 UniFi Protect App Visitor Tone
Smart Home Automations Worth Trying
Here are a few automations that make the G4 Doorbell Pro really shine. Each can be built in Home Assistant using the UniFi Protect entities covered above.
- Flash porch lights when the doorbell rings at night
- Pause Plex or TV when someone’s at the door
- Trigger LLM Vision for AI-based visitor summaries (see my earlier post)
I’ll be sharing YAML examples for several of these automations in the upcoming posts in this UniFi series.
How It Compares After a Year and a Half
After a year and a half of daily use, I still think this is the best smart doorbell I’ve used.
- I haven’t missed a single notification or motion capture.
- With wired Ethernet, live video and two-way communication are smooth and responsive.
- Build quality is excellent, and it’s held up great.
(The zoomed-in picture in the header is my actual doorbell.)
There’s only been one issue: the visitor tone garbled once when the button was pressed, but a quick reboot fixed it.
It’s not cheap, but with no monthly fees and tight Protect integration, it’s been one of the most reliable smart home devices I own, even after a year and a half of North Dakota weather.
Related Posts in This Series
- Part 1: Living with the UniFi G4 Doorbell Pro (you’re here)
- Part 2: Automating UniFi Protect Alarms and Webhooks
- Part 3: NFC and Fingerprint Access with Home Assistant
- Part 4: Custom Animations and Sounds with Home Assistant
- Part 5: Doorbell MQTT UniFi - Full setup guide
There’s one more part planned for this series — a project that takes things a bit further. I’ll share more when it’s ready.
One of the things I love about the Home Assistant community is how creative people get with the details that make a setup feel personal. A fellow user designed these “Secured with Home Assistant” stickers and shared them freely, and they’re too good not to include here.
 “Secured with Home Assistant” sticker created and freely shared by a member of the Home Assistant
Facebook community. Included here with permission so others can enjoy it as part of their smart
home setups.
“Secured with Home Assistant” sticker created and freely shared by a member of the Home Assistant
Facebook community. Included here with permission so others can enjoy it as part of their smart
home setups.
Want to share your thoughts or ask a question?
This blog runs on coffee, YAML, and the occasional dad joke.
If you’ve found a post helpful, you can
support my work or
☕ buy me a coffee.
Curious about the gear I use? Check out my smart home and homelab setup.