Integrating BLE Epaper Displays with Home Assistant
Turn grocery store-style epaper tags into real-time smart displays for your home using ESP32 and Home Assistant. Learn how to set up OpenEPaperLink and create dynamic dashboards with ease.
Update (September 2025): This post was updated for OpenEPaperLink v2.0. See the Update Notes for details
What if the same electronic price tags used in grocery stores could display real-time information about your home? As a tech lead at a Point of Sale software company, I work with these epaper displays daily — but thanks to OpenEPaperLink, Home Assistant, and an ESP32, I’ve found a way to bring them into my smart home. These low-power BLE tags are perfect for showing glanceable info like shopping lists, thermostat readings, and calendar events. In this post, I’ll walk you through the setup so you can add these tiny, always-on displays to your own smart home too.
Resources for This Project
ChrisHansenTech is a participant in the Amazon Services LLC Associates Program, an affiliate advertising program designed to provide a means for sites to earn advertising fees by advertising and linking to Amazon.com. As an Amazon Associate I earn from qualifying purchases.
- ESP32 N16R8 (16 MB Flash, 8 MB PSRAM) Board
- Epaper Tags – I use the two listed below, but other sizes are available:
I’ve seen similar tags on AliExpress and eBay, but I haven’t personally purchased or tested them.
Installing OpenEPaperLink from HACS
- Open HACS
- Search for OpenEPaperLink
- Select OpenEPaperLink from the search results
- Click Download
- In the confirmation prompt, click Download
After installing the OpenEPaperLink integration, restart Home Assistant.
Flashing OpenEPaperLink on ESP32
- Open the OpenEPaperLink Installer web page.
- Select BLE only AP if you’re following this guide.
- Connect your ESP32 board to your computer.
- Click Connect.
- Select the ESP32 port and click Connect.
- Click Install OpenEPaperLink.
- Confirm by clicking Install.
- Click Next when the installation is complete.
- Enter your Wi-Fi credentials and click Next.
- Once the device is connected to the network, click Add to Home Assistant.
- Validate your Home Assistant instance URL and click Open Link.
- Home Assistant will prompt you to add OpenEPaperLink — click OK.
- Enter the device’s IP address and click Submit.
- Optionally, assign an area for the AP and any detected tags, then click Finish.
Testing an Epaper Tag Update
With the ESP32 AP now set up and connected to Home Assistant, we can start interacting with the tags. Let’s begin by adding a large home icon to the display, along with the text “Home Assistant” beneath it—just like the header image at the top of this post.
- Click Developer Tools
- Click Actions
- Select the OpenEPaperLink: Draw Custom Image action
- Choose a tag as the device
- In the Payload box, type in the YAML:
1
2
3
4
5
6
7
8
9
10
11
12
13
14
- type: dlimg
  url: "https://esphome.io/_images/home-assistant.png"
  x: 100
  y: 45
  xsize: 200
  ysize: 200

- type: text
  value: Home Assistant
  x: 50%
  y: 90%
  anchor: "mm"
  size: 40
  color: black
The
xandyvalues can be in pixels or percentage.The
anchordetermines how the text is positioned. The first character is the vertical anchor, and the second is the horizontal anchor. In this case,mmmeans middle-middle.
- Choose a white background
- Click Perform Action
After a few seconds, the display should begin updating and show the image.
Next, we’ll use templates to show values from a weather sensor. I’m using my Ecobee thermostat — you can replace this with any climate sensor available in Home Assistant.
1
2
3
4
5
6
7
- type: text
  value: "{{ state_attr('climate.thermostat','current_temperature')}}°F  {{ state_attr('climate.thermostat','current_humidity') }}%"
  x: 50%
  y: 5%
  anchor: "mm"
  size: 25
  color: black
Since Epaper displays aren’t quick to update, adjusting the layout can take a bit of trial and error. Before clicking Perform Action, toggle the Dry Run option. This generates the image without sending it to the display. If you check the image entity for your tag, it will show the rendered image. Using Dry Run helps you fine-tune the design before pushing it live.
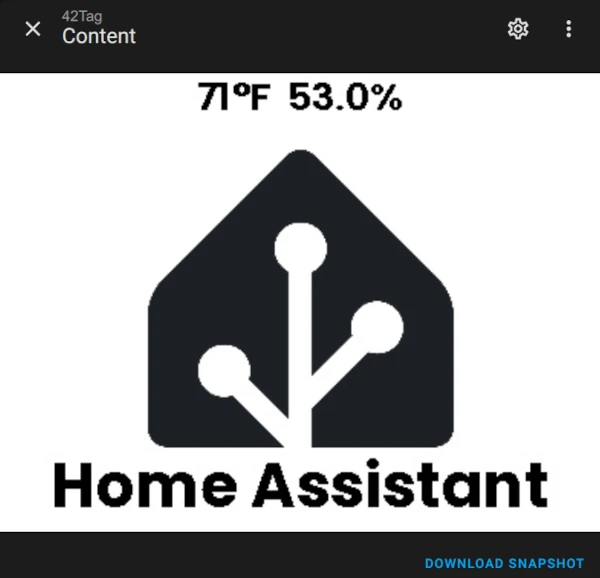 OpenEPaperLink Image Display
Features
As seen in the examples, you can display images, text, and entity data using templates. You can also use the following types:
- Debug Grid
- Text
- Multiline Text
- Line
- Rectangle
- Rectangle Pattern
- Polygon
- Circle
- Ellipse
- Arc / Pie Slice
- Icon
- Icon Sequence
- Download Image
- QR Code
- Plot
- Progress Bar
- Template Examples
For more details, refer to the OpenEPaperLink Draw Custom documentation.
Tips
Each Epaper tag device exposes width and height entities that show the display resolution in pixels.
To help visualize layout, use the type: debug_grid payload. This renders a grid with labeled pixel coordinates on the screen.
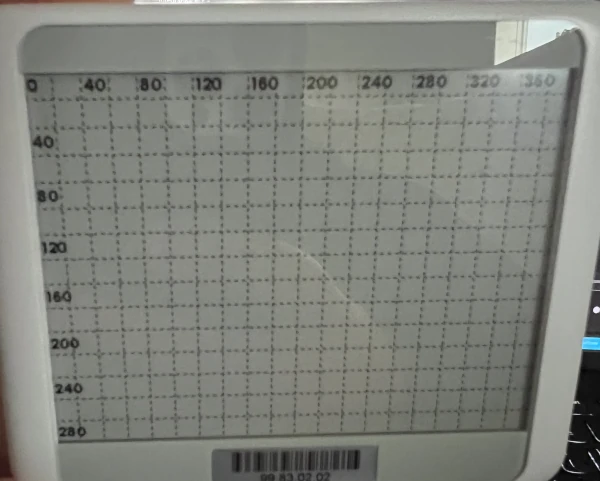 Debug Grid
I’ve had good luck using ChatGPT to generate layouts. One caveat: you’ll need to provide the supported_types.md file from the OpenEPaperLink Home Assistant GitHub repository for it to generate valid YAML. I also tried using Ollama with Llama 3.2, but it didn’t work — my video card can’t handle anything more powerful.
Example prompt:
Create a drawcustom layout for OpenEPaperLink designed for a 4.2” ESL tag (400x300 resolution). The screen should be divided into four quadrants.
- Each quadrant must have a header at the top with white text on a red background
- Center the text of the header in the middle and center.
- Use a 14-point font for the bullet points and an appropriate size (e.g., 18pt) for the headers to make them stand out.
- Ensure layout spacing and text alignment are visually balanced.
Add four bullet points to each quadrant using lorem ipsum text.
Return the configuration in valid YAML format compatible with the OpenEPaperLink drawcustom payload.
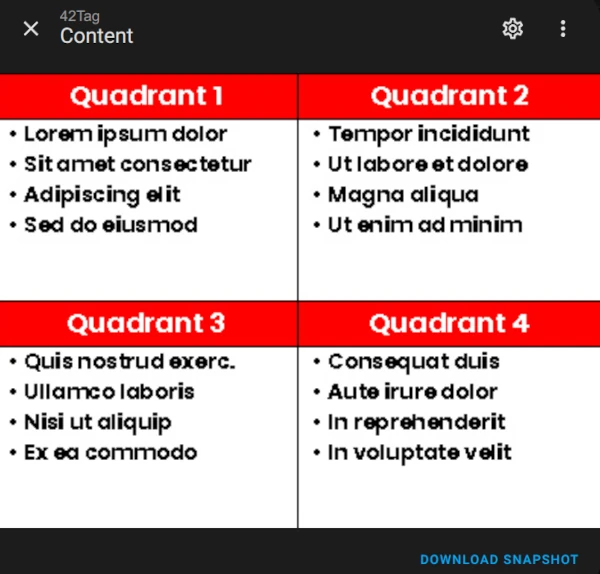 ChatGPT Generated YAML Output
How I Use Epaper Tags
The scripts used in my examples are available in my GitHub BlogCode repository.
4.2 Inch Tag
I attached magnets to the clip on my 4.2” tag and placed it on the fridge. I use two displays with this one: a shopping list for our basement storage and a babysitter info screen.
An input boolean controls which display is shown.
Shopping List
I use Grocy to track items in our basement storage room. When I remove something from storage, Grocy reduces the inventory. If the stock drops below a defined threshold, the item is automatically added to the Grocy shopping list, which is synced to Home Assistant via the Shopping List with Grocy HACS integration.
Now, my wife no longer needs to ask if we’re low on something — she can just check the fridge display.
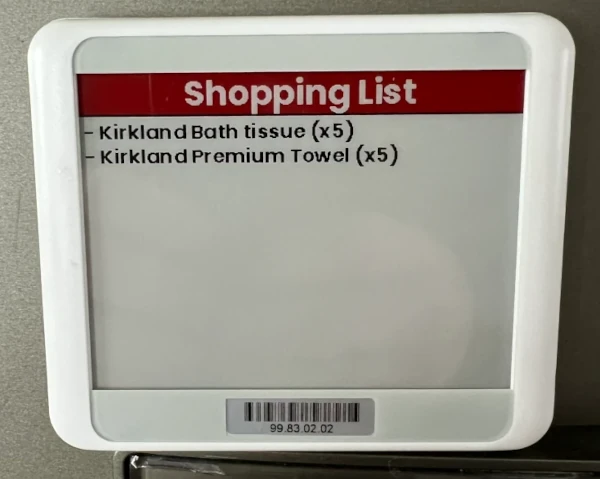 Shopping List Tag
Babysitter Info
When my wife and I go out — which isn’t very often — the Epaper display shows babysitter information like the girls’ bedtime, emergency contacts, Wi-Fi credentials, and more.
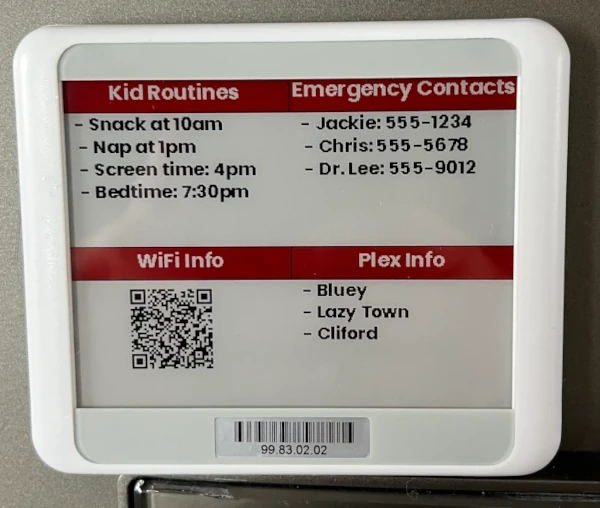 Babysitter info
2.9 Inch Tag
I mounted a 2.9” tag on the door to my home office. When it shows a red background with the word “BUSY,” my daughters know I’m probably in a meeting. I use CalDAV to sync my Google work calendar to Home Assistant, which controls when the busy message appears.
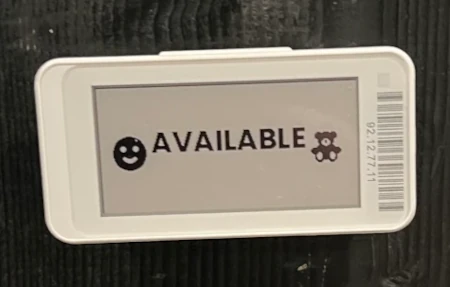 Available
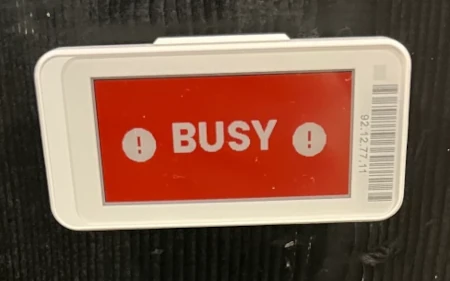 Busy
Busy
Final Thoughts
Epaper tags are a fantastic way to display Home Assistant data. They use almost no power, are easy to read, and are incredibly versatile. Since you can display almost anything, they’re perfect for surfacing useful information around the house. I plan to add even more tags and displays in the future.
Update Notes
- 2025-09-13:
- Image Entity Replaces Camera Entity: The
cameraentity, which was previously used to display the content of the tags, has been replaced with animageentity. This change was made to better align with Home Assistant’s entity model. All automations and Lovelace dashboards that previously used the camera entity will need to be updated to use the new image entity.
- Image Entity Replaces Camera Entity: The
Frequently Asked Questions
What is OpenEPaperLink?
OpenEPaperLink is an open-source project that enables BLE-based epaper tags to function as low-power smart displays. It connects to your network via an ESP32 microcontroller and integrates with Home Assistant for automation and custom layouts.
Do I need to solder or modify the epaper tags?
No modifications are required. The tags I use are Bluetooth-enabled and work out of the box with OpenEPaperLink and an ESP32 flashed with the appropriate firmware. If your tags use a different communication protocol, you may need to solder or purchase additional components.
Can I use different sizes of epaper tags?
Yes. Multiple sizes are available. OpenEPaperLink supports a variety of models, and you can create layouts specific to each display’s resolution.
How often can the display update?
Epaper displays are not designed for frequent updates. Updates typically take several seconds, and excessive refreshes may reduce tag lifespan. Use them for glanceable data that doesn’t change rapidly.
Is an internet connection required?
No. Once connected to your local network, the ESP32 and tags operate independently through Home Assistant. However, remote access to Home Assistant may require internet connectivity.
Can I show dynamic sensor data like temperature or calendar events?
Absolutely. By using Home Assistant templates, you can render sensor values, calendar info, weather, and more directly to your epaper display.
After flashing my ESP32 board, why don’t I see the Wi-Fi setup dialog?
On some ESP32 boards with two USB ports, the dialog may not appear right away. If this happens, try switching to the other USB port on the board and reconnecting. Once reconnected, the Wi-Fi setup dialog should appear and you can continue with the next steps.
Want to share your thoughts or ask a question?
This blog runs on coffee, YAML, and the occasional dad joke.
If you’ve found a post helpful, you can
support my work or
☕ buy me a coffee.
Curious about the gear I use? Check out my smart home and homelab setup.