Aqara Smart Valve Controller: Leak Protection with Home Assistant
How to install and integrate the Aqara Smart Valve Controller with Home Assistant using Matter, HomeKit, and MQTT for leak detection and water damage prevention.
Water can cause a lot of damage in a home, and it rarely sends a calendar invite first. Seneca once wrote, “The unexpected can happen at any time — prepare before it does.” That’s exactly what this project is about.
By pairing leak sensors with the Aqara Smart Valve Controller, you can shut off your water before a small problem becomes an expensive disaster. It’s the modern version of being prepared.
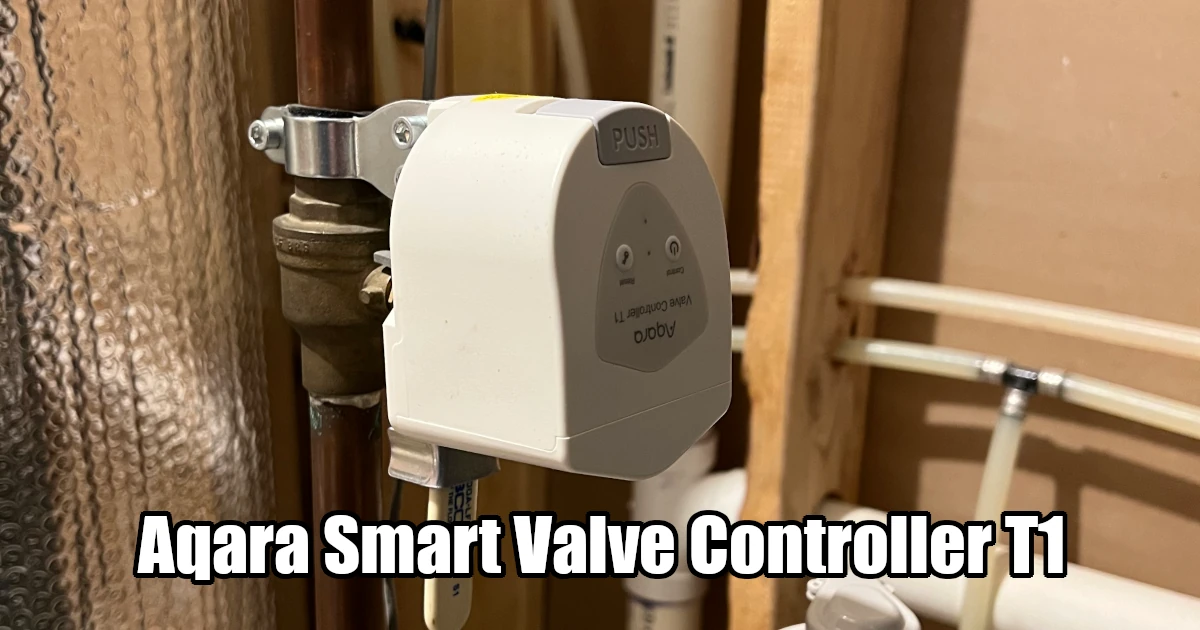
The Aqara Smart Valve Controller can be installed on most ball valves without the need for a plumber, making it easy to add shutoff automation to your home. Combined with leak sensors and a smart hub, you can automatically shut off your water supply when a leak is detected—whether you’re home or not.
Things used in this project
ChrisHansenTech is a participant in the Amazon Services LLC Associates Program, an affiliate advertising program designed to provide a means for sites to earn advertising fees by advertising and linking to Amazon.com. As an Amazon Associate I earn from qualifying purchases.
- Aqara Smart Valve Controller T1
- Aqara Leak Sensors (Zigbee)
- Aqara Hub M3 (for Matter and HomeKit integration)
- Sonoff Zigbee 3.0 USB Dongle Plus (for Zigbee2MQTT users)
- Home Assistant
- Zigbee2MQTT (for direct MQTT control option)
Want to see all the devices I use day-to-day?
Check out my Tech I Use page.
Installing the Aqara Smart Valve Controller
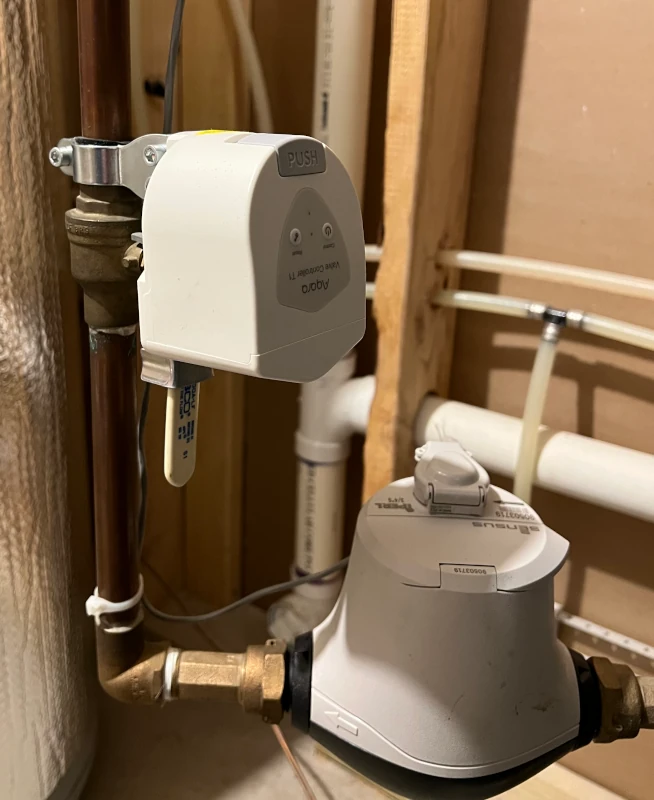
The Aqara Smart Valve Controller mounts directly to the pipe and over the handle of your existing ball valve. The adjustable mounting bracket and included tools make the installation process straightforward.
- Attach the mounting bracket to the pipe.
- Secure the controller to the mounting bracket so it is over the handle for the valve.
- Tighten all screws so the arm can fully open and close the valve without slipping.
- Insert the four AA batteries into the controller.
- The lights should start flashing to join a Zigbee network.
Setting it up in the Aqara App
The steps below are based on the iPhone Aqara App. The Aqara App may autodetect the valve controller allowing you to skip some of these steps.
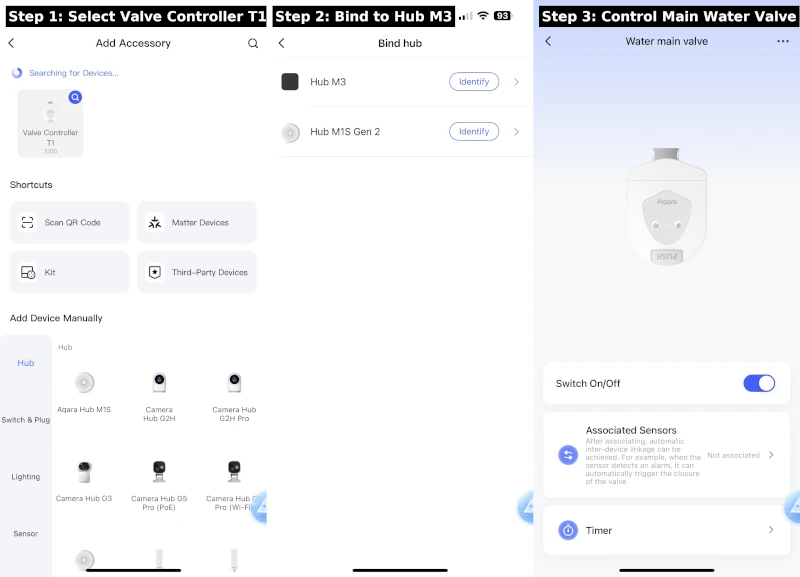
- Open the Aqara app
- Touch the + icon and select Add Accessory
- Choose Valve Controller T1 from the device list
- Select the Hub to pair with
- Assign an accessory name such as Water main valve and assign a location
- Validate the Device Card Information and make any changes to the icon etc
- Touch the Done button
- Test the open/close functions from the Aqara app to ensure it’s mounted correctly
At first I thought the bolts were tight, but the first run loosened them. After tightening again, it held firm. You may run into the same issue.
If you’re new to Aqara hubs, I have a full write-up on the Aqara M3 Hub with Matter and HomeKit.
Sharing with Home Assistant via Matter and HomeKit
If you have an Aqara Hub M3, you can share the valve controller with Home Assistant through Matter or HomeKit.
Using Matter
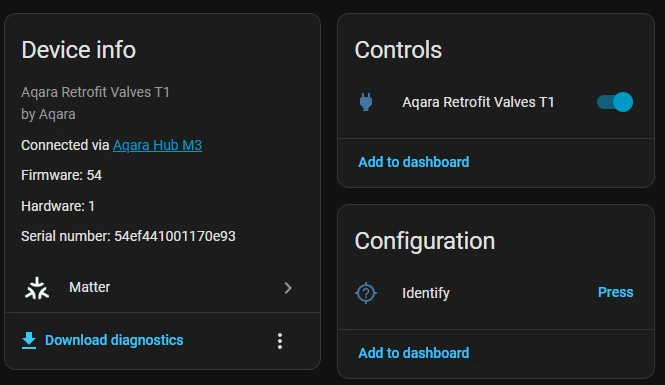
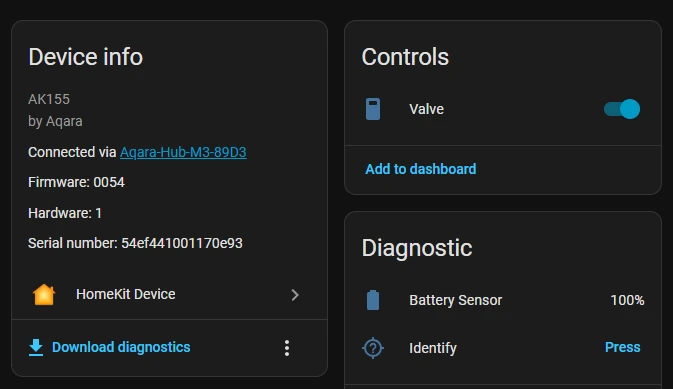
If you already have your Aqara Hub connected to Home Assistant with Matter the valve will automatically appear in Home Assistant.
To connect your Aqara Hub to Home Assistant with Matter:
- In the Aqara app, touch Accessories > Your Hub > Third-Party Matter Ecosystems > Matter Pairing Code
- Scan the Matter pairing code in Home Assistant (Settings → Devices & Services → Add Integration → Matter).
- The valve will appear in Home Assistant with on/off (open/close) controls.
If you want to see another example of Matter in action, I’ve also written about the Aqara U100 Smart Lock.
Using HomeKit
If you already have your Aqara Hub connected to Home Assistant with HomeKit the valve will automatically appear in Home Assistant.
To connect your Aqara Hub to Home Assistant with HomeKit:
- In the Aqara app, touch Accessories > Your Hub > HomeKit > Pairing Code
- In Home Assistant, enable HomeKit Controller integration.
- Home Assistant will detect the device and let you pair it directly.
Setting it up in Home Assistant using MQTT
If you prefer direct Zigbee control without going through the Aqara Hub, you can pair the valve controller to Zigbee2MQTT.
- Make sure the valve is in pairing mode.
- In Zigbee2MQTT, click Permit Join and wait for the device to appear.
- Once paired, the device will be available in Home Assistant through the MQTT integration.
This approach bypasses the Aqara Hub entirely, giving you local control and the ability to integrate with any Home Assistant automation. For a reliable coordinator, I recommend the Sonoff Zigbee 3.0 USB Dongle Plus.
I read that to reset the valve and put it back into pairing mode you should press the reset button 5 times. However, this did not work for me.
The solution I found was to remove a battery to power it off, then hold the reset button while reinserting the battery.
Tips & Gotchas
- Do not share the main water valve with voice assistants unless you’re prepared for unintended consequences.
I learned this the hard way. One day I told Siri to “turn off the pool pump.” She apparently decided to be extra helpful and also turned off the main water valve. About 10 minutes later, the dishwasher started beeping and flashing an H2O error code. At first I thought it was just being temperamental, but then I realized—Siri had shut off all the water. Not exactly the kind of automation you want running by accident. - Test valve operation a few times to ensure the mounting bracket is tight and the motor can fully open and close the valve without strain.
Automation Examples
Here are three practical automations I run with the valve. You can copy/paste these into your Home Assistant YAML:
Leak detection shutoff
1
2
3
4
5
6
7
8
9
10
11
12
alias: Shut off water on leak
mode: single
triggers:
  - trigger: state
    entity_id:
      - binary_sensor.<leak_sensor_entity>
    to: "on"
conditions: []
actions:
  - action: switch.turn_off
    target:
      entity_id: switch.<valve_entity>
Freeze protection
1
2
3
4
5
6
7
8
9
10
11
12
alias: Shut off water if pipes may freeze
mode: single
triggers:
  - trigger: numeric_state
    entity_id:
      - sensor.<temperature_sensor_entity>
    below: 34
conditions: []
actions:
  - action: switch.turn_off
    target:
      entity_id: switch.<valve_entity>
Vacation mode shutoff
1
2
3
4
5
6
7
8
9
10
11
12
alias: Shut off water in vacation mode
mode: single
triggers:
  - trigger: state
    entity_id:
      - input_boolean.<vacation_mode_entity>
    to: "on"
conditions: []
actions:
  - action: switch.turn_off
    target:
      entity_id: switch.<valve_entity>
Final Thoughts
Adding the Aqara Smart Valve Controller to your smart home setup is one of those upgrades you hope you’ll never need—but will be grateful for if you do. Pairing it with leak sensors and smart automations can save you thousands in water damage and give you peace of mind whether you’re at home, at work, or away on vacation.
Like any critical automation, take time to test it thoroughly, avoid risky integrations with voice assistants, and keep a manual fallback plan. Done right, it’s a simple project that can protect your home from one of the most expensive and inconvenient types of damage.
Want to share your thoughts or ask a question?
This blog runs on coffee, YAML, and the occasional dad joke.
If you’ve found a post helpful, you can
support my work or
☕ buy me a coffee.
Curious about the gear I use? Check out my smart home and homelab setup.
