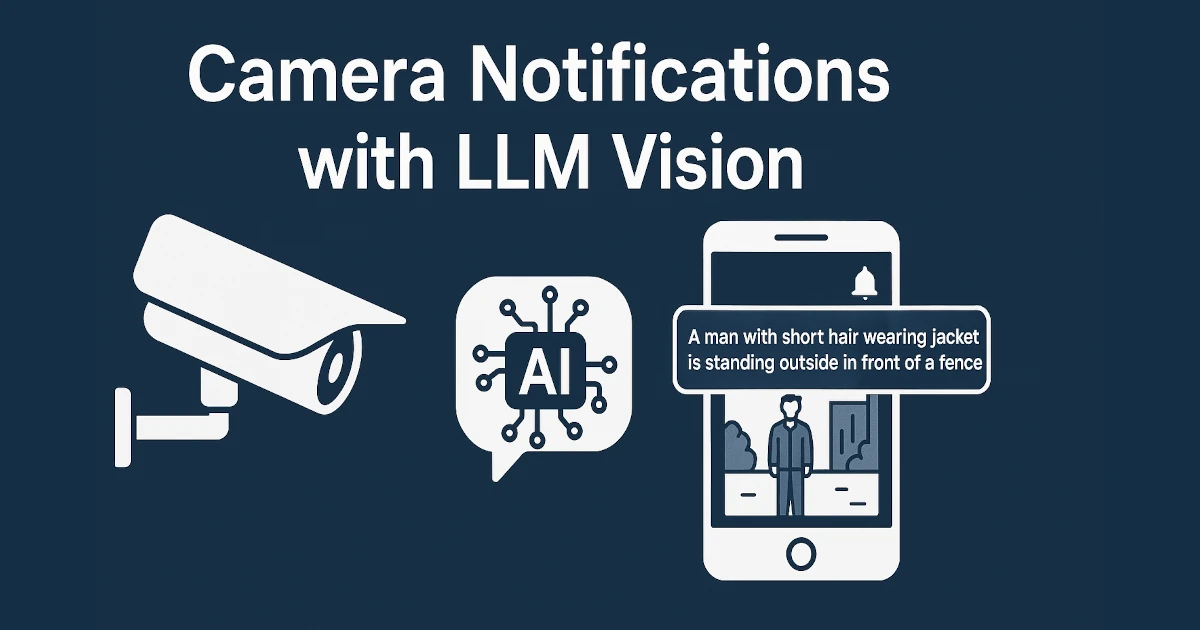
LLM Vision Home Assistant + AI - Smarter Camera Alerts
Updated guide for Home Assistant LLM Vision v1.5.2: smarter Home Assistant camera alerts using AI. Learn to install, automate, and visualize with actionable notifications.
Update (October 2025): This post was updated for LLM Vision v1.5.2, which includes breaking changes to the snapshot paths. See the Update Notes for details.
It started with a message from a fellow Home Assistant user struggling with a blueprint. They shared a screenshot of their goal: an automation that snaps a photo when motion is detected and sends it—complete with an AI-generated description—as a mobile notification. I’d only used notifications for simple things, like knowing when a door was left open or the laundry was finished, but I really liked the idea of combining AI with real-time alerts. It didn’t take long to get it working, and I realized it was too useful not to share. So in this post, I’ll walk you through the exact setup, step by step.
Automation Requirements
The main goal of the automation is to send a notification to the phone using the Companion App.
- Triggered by the camera detecting motion
- Use LLM Vision to analyze the image
- Attach the image to the notification
- Action to open the camera dashboard
- Save the images for 7 days for review
Installing LLM Vision
LLM Vision is a Home Assistant integration available through HACS that uses AI to analyze an image.
To install LLM Vision:
- Open HACS
- Search for LLM Vision and open it
- Click DOWNLOAD
- Click DOWNLOAD again on the confirmation popup
After it is downloaded, a restart of Home Assistant is required. Click Settings and use the notification from LLM Vision to restart Home Assistant.
Installing the LLM Vision Integration
- Click Settings → Devices & Services
- Click ADD INTEGRATION → search for LLM Vision
- Select it and click Submit to accept defaults
- Click FINISH when complete
Note: The Timeline (Event Calendar) is enabled by default in LLM Vision and creates a calendar entity (
calendar.llm_vision_timeline) that logs analyzed events. Timeline entries—and any images saved viaexpose_images—are automatically deleted after the configured retention period. If you’d like to adjust the auto-delete or calendar behavior, use the Reconfigure option on the Settings integration (not the provider entries).
Add Your First LLM Provider
- In LLM Vision integration, click Add Entry
- Select provider (e.g. OpenAI)
- Submit required credentials/settings
- Click Submit, then FINISH
Note: After installing the base LLM Vision integration, you can add additional provider entries by clicking Add Entry in the integration settings if you want to try other LLM platforms (e.g. OpenAI, Claude, Ollama, Gemini). Each provider has independent configuration options.
Test LLM Vision
Now that we have LLM Vision installed, let’s run a quick test.
- Click Developer Tools > ACTIONS
- In the Action box, type LLM and select LLM Vision: Image Analyzer
- Select the Provider
- In the Prompt box, type Describe this image in a few sentences to be used in a mobile notification triggered by motion detected.
- Check the Image Entity box and select a camera entity
- Set Max tokens to 100
- Click PERFORM ACTION
After the image is analyzed by the LLM, the results will be shown below in the Response area.
 Test Response
If you click GO TO YAML MODE, you’ll see the simple YAML that performs this action:
1
2
3
4
5
6
7
8
9
10
action: llmvision.image_analyzer
data:
  provider: 01JQ97M2HWGQR20830PGFWDRY7
  message: >-
    Describe this image in a few sentences to be used in a mobile notification
    triggered by motion detected.
  image_entity:
    - camera.front_door
  include_filename: true
  max_tokens: 100
Creating the Initial Automation
Now that we have LLM Vision installed and tested, we can create the automation. This initial automation will be triggered by motion detected by the camera.
Let’s create the trigger. I’m using the Person Detected entity from my UniFi G4 Doorbell.
- Click Settings > Automations & Scenes
- Click Create automation
- Click Create new automation
- Click Add trigger
- Click Entity > State
- In the Entity box, select the motion entity
- Set From to off or clear (depending on your entity)
- Set To to on or detected
Next, let’s create the actions.
The first action is to send the camera image to LLM Vision to get a message based on the image analysis.
- Click Add action
- Type LLM Vision into the search box and select LLM Vision: Image Analyzer
- Select your provider
- Type your prompt into the Prompt box
- Example: Write a short, natural-sounding description of a person detected at the front door, based on an image. The description should highlight observable traits like clothing, hair color, accessories, and approximate age or gender, suitable for a smart home notification. Keep the response under 100 tokens.
- Check Remember and toggle the switch to update the timeline
- Check Image Entity and select your camera
- Check Title and toggle the switch to generate a title
- In the Response variable box, type llm_response
- Check Expose image and toggle the switch to save the key frame image
Expose image saves the image in
/media/llmvision/snapshots
Next, we’ll send the notification using the LLM Vision response and attach the image.
- Click Add action
- Type Notify into the search box and select Notifications: Send notification via mobile_app_<your_device_name>
Since we’re using Jinja templates, we need to switch to YAML. Click the ellipsis and choose Edit in YAML.
If you type {{ in the Message box, it will automatically switch to the YAML editor.
Type in the following YAML, replacing <your_device>:
1
2
3
4
5
6
7
8
9

action: notify.mobile_app_<your_device>
metadata: {}
data:
  title: "{{ llm_response.title }}"
  message: "{{ llm_response.response_text }}"
  data:
    image: "{{ llm_response.key_frame.replace('/media', '/media/local') }}"
If you don’t want to use the LLM-generated title, here are two alternatives:
- Device name:
title: "{{ device_attr(device_id(trigger.entity_id), 'name') }}" - Entity name:
title: "{{ state_attr(trigger.entity_id, 'friendly_name') }}"
Click Save to save your automation and test it out.
Implementing an Actionable Notification
Now that the notification works, let’s add an action to open a camera dashboard.
Update the notification YAML to include the actions dictionary:
1
2
3
4
5
6
7
8
9
10
11
12
13

action: notify.mobile_app_<your_device>
metadata: {}
data:
  title: "{{ llm_response.title }}"
  message: "{{ llm_response.response_text }}"
  data:
    image: "{{ llm_response.key_frame.replace('/media', '/media/local') }}"
    actions:
      - action: uri
        title: Open Cameras
        uri: homeassistant://navigate/mobile/cameras
Replace /mobile/cameras with your actual camera dashboard path.
Click Save and test it out.
Android supports
uri: "entityId:<your_camera_entity>"to open the camera feed directly.
iOS supports displaying the camera feed directly in the notification. Replace
imagewithentity_id: camera.<your_camera>. This shows the live feed instead of the snapshot.
 iOS Notification
If your camera is in a busy area, consider adding a Delay action at the end of the automation to prevent repeated notifications.
LLM Vision Timeline Card
To complete the setup, let’s add the LLM Vision Timeline card to a dashboard.
First, install the card from HACS.
If you can’t find the LLM Vision Card in HACS, add the custom repository manually. You can find it here: LLM Vision Timeline Card
- Open HACS
- Search for LLM Vision Card
- Select it
- Click Download
After downloading, add it to a dashboard. At a minimum, you’ll need to set calendar_entity to match the one created by the Timeline.
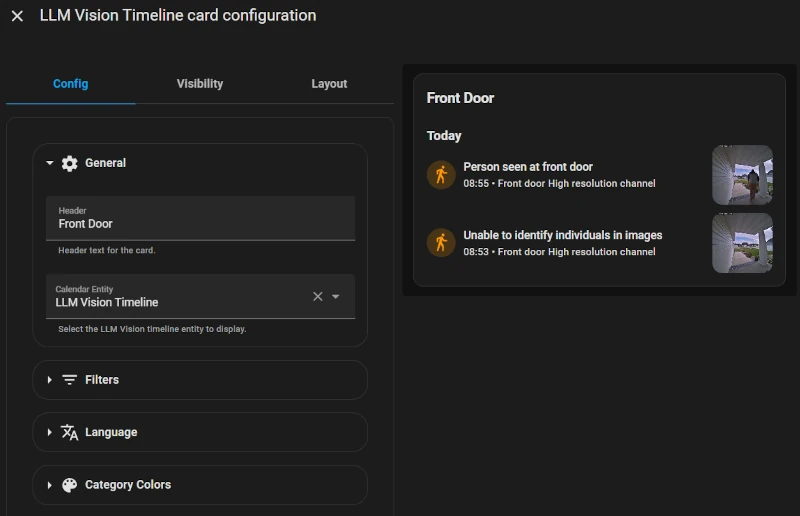 Timeline Card Settings
1
2
3
4
5
6
type: custom:llmvision-card
calendar_entity: calendar.llm_vision_timeline
number_of_events: 5
refresh_interval: 10
entity: calendar.llm_vision_timeline
header: Front Door
Adjust the settings to suit your preferences.
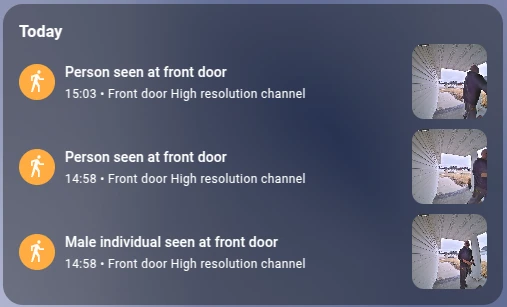 LLM Vision Timeline Card
When you click on an event in the timeline card, it will display the image and details associated with that event.
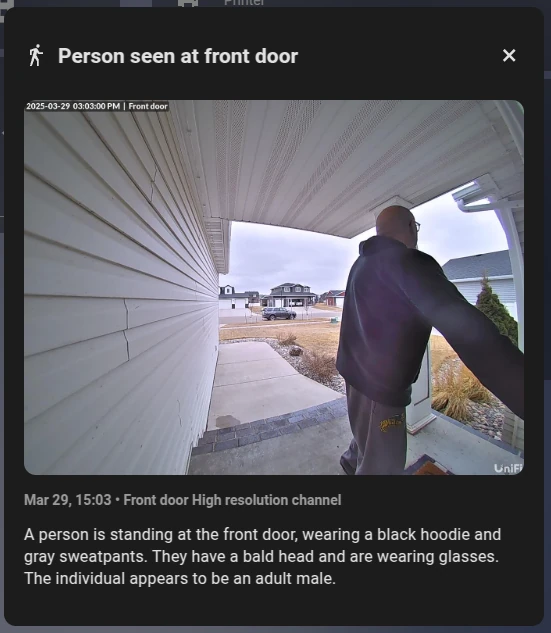 LLM Vision Timeline Card Details
Cameras I Use
ChrisHansenTech is a participant in the Amazon Services LLC Associates Program, an affiliate advertising program designed to provide a means for sites to earn advertising fees by advertising and linking to Amazon.com. As an Amazon Associate I earn from qualifying purchases.
This automation runs with my Unifi G4 Doorbell Pro, which is currently my only outdoor camera, and with three indoor Reolink E1 Pro cameras. What I like about both Unifi and Reolink is that they expose person, animal/pet, and vehicle detection sensors in Home Assistant, not just generic motion.
That means I can set up more useful notifications. For example:
- I get an alert only if a person approaches the door, not every passing car or bird.
- Inside the house, I only get notified if the dogs enter a room they are not supposed to, rather than constant alerts every time someone walks by.
- I also save on processing and bandwidth by not sending every detection to ChatGPT just to find out it was a car driving by.
It is one of those small details that makes a big difference in keeping notifications helpful, lightweight, and privacy-conscious.
Conclusion
This was a fun little project. Not only did I get to help a fellow Home Assistant user, but I also explored some features I hadn’t tried before. Integrating LLM Vision adds a layer of intelligence and usefulness to camera notifications.
By combining image snapshots, AI-generated descriptions, and actionable alerts, you can create a smart, context-aware notification system that actually tells you what’s happening—without having to open the camera feed every time.
If you’re looking for a weekend project to level up your smart home, this is a great place to start.
Update Notes
LLM Vision v1.5.2
Breaking changes
- Timeline snapshots have moved from
/config/media/llmvision/snapshotsto/media/llmvision/snapshots.
Remove the folder configuration you may have added to your configuration.yaml
1
2
3
4
 homeassistant:
    media_dirs:
      media: /media # Remove this line
      llmvision: /config/media/llmvision # Remove this line
Any custom automations that use the snapshots the template will have to be updated to
{{ response.key_frame.replace('/media','media/local') }}
LLM Vision v1.5.1
Breaking changes:
- Timeline snapshots have moved from
/wwwto/media. Add the following to yourconfiguration.yaml:1 2 3 4
homeassistant: media_dirs: media: /media llmvision: /config/media/llmvision
Make sure to create
/media/llmvisionbefore restarting. Update to the latest LLM Vision Card or snapshots won’t display correctly. max_tokensis now a number input instead of a slider, supporting much larger values. If you notice empty responses, try increasingmax_tokens.
LLM Vision v1.5.0
Breaking Changes:
- Timeline and Memory into the unified Settings entry, provider‑level temperature controls, and fallback provider options. YAML examples and screenshots have been revised accordingly.
Frequently Asked Questions
What is LLM Vision in Home Assistant?
LLM Vision is a custom integration that uses large language models to analyze camera snapshots and generate smart notifications in Home Assistant.
How do I set up LLM Vision with Home Assistant?
Install via HACS, add it under Devices & Services, configure a provider, and create an automation that analyzes snapshots when motion is detected.
Why don’t I see the timeline or saved images?
Ensure expose_images is enabled and that
calendar.llm_vision_timeline exists. Images are written under
/config/media/llmvision/ check file permissions if missing.
Is this guide up to date with new releases?
Yes. I maintain this guide with every release, including breaking changes in v1.5.1. Older posts in search usually cover the 2024 beta and are out of date.
Want to share your thoughts or ask a question?
This blog runs on coffee, YAML, and the occasional dad joke.
If you’ve found a post helpful, you can
support my work or
☕ buy me a coffee.
Curious about the gear I use? Check out my smart home and homelab setup.